
 |
 |
|||||
| 1 | 2 | 3 | 5 | |||
February 20, 2009 - Super Goblin tailplane and secret jig...
Hi,
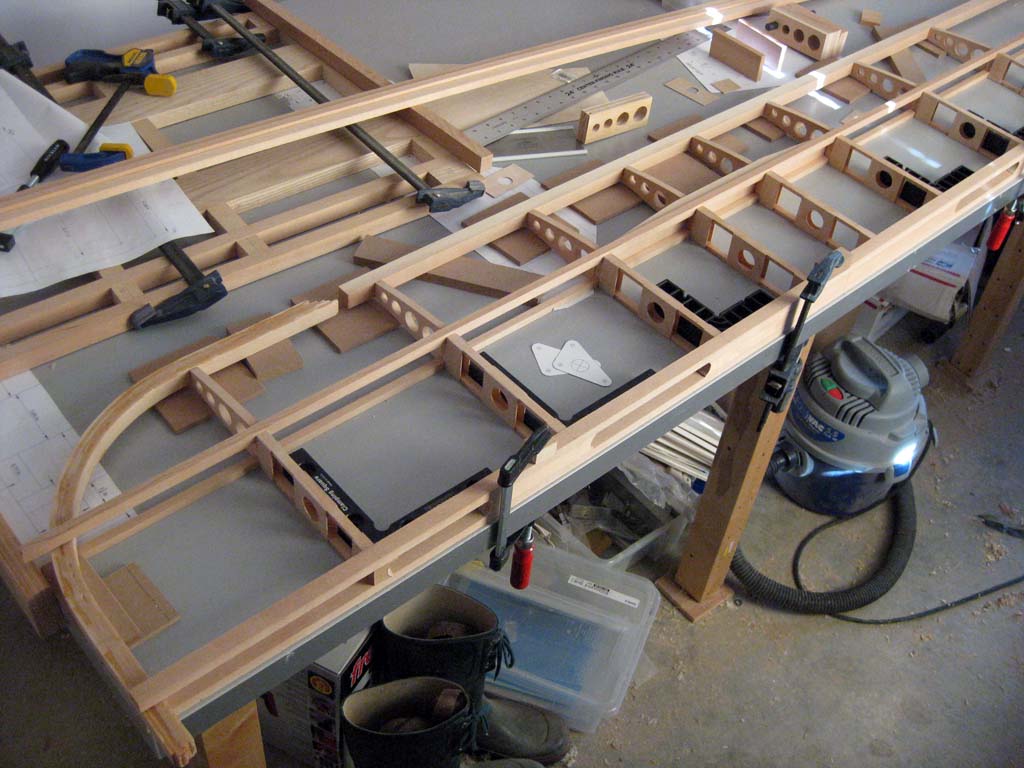
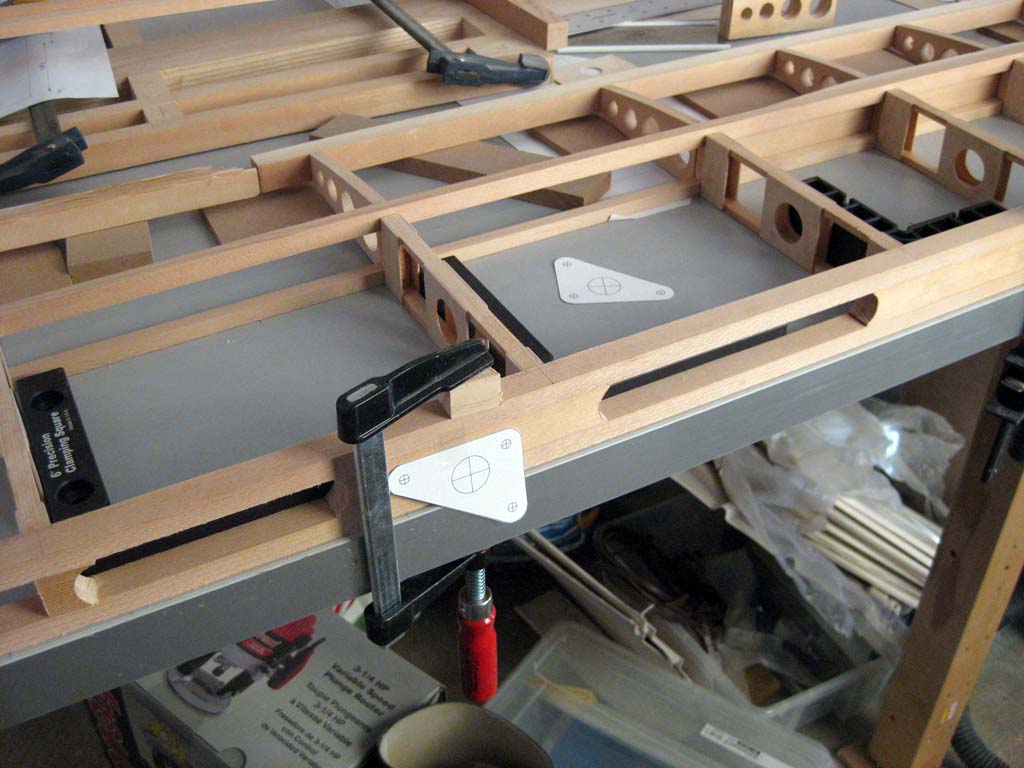
I am working on the tail plane for the Super Goblin, mostly just trying out all the bits and pieces. One question is the inside plate has to be accessed and the plywood need to be supported somehow?
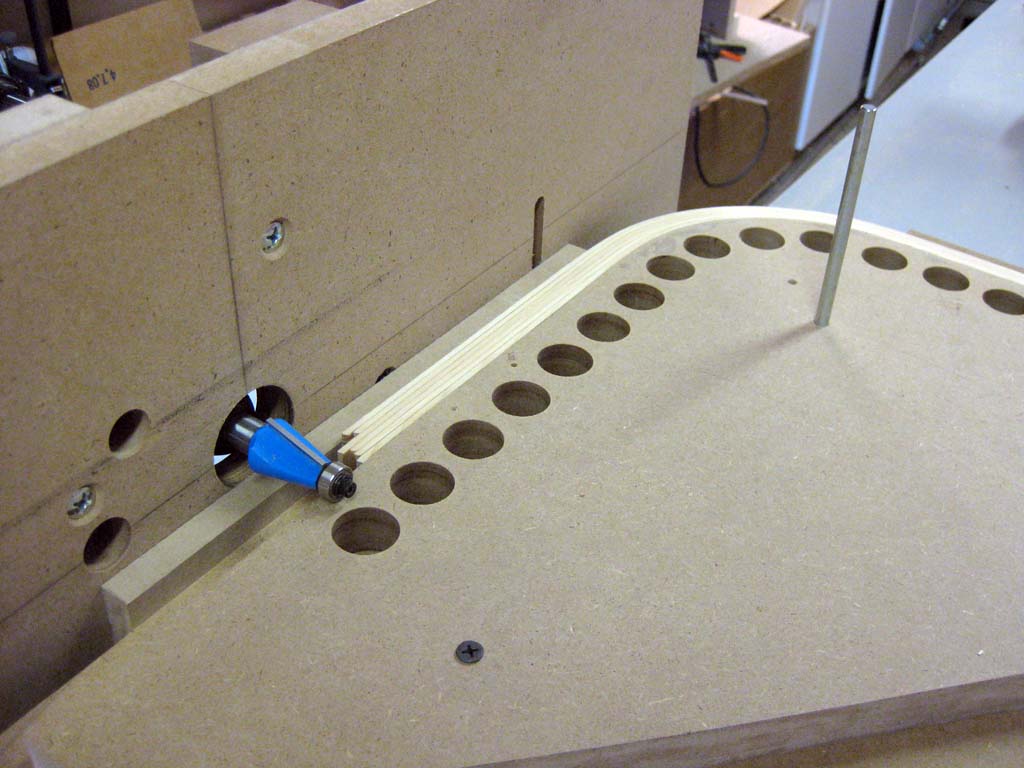
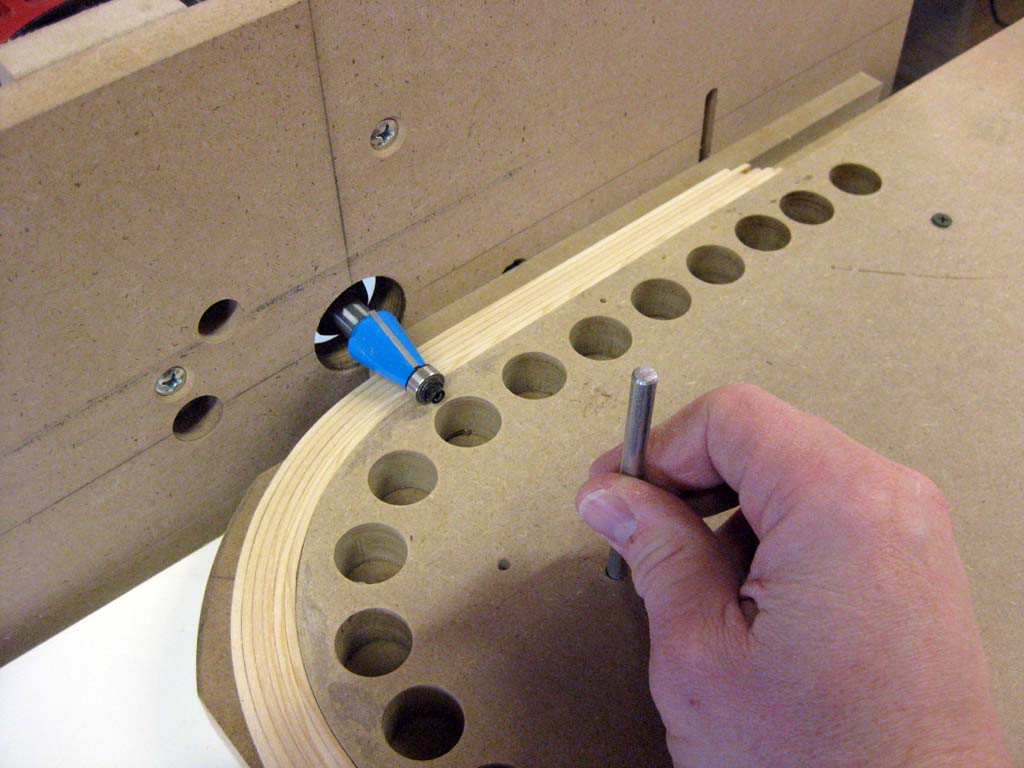
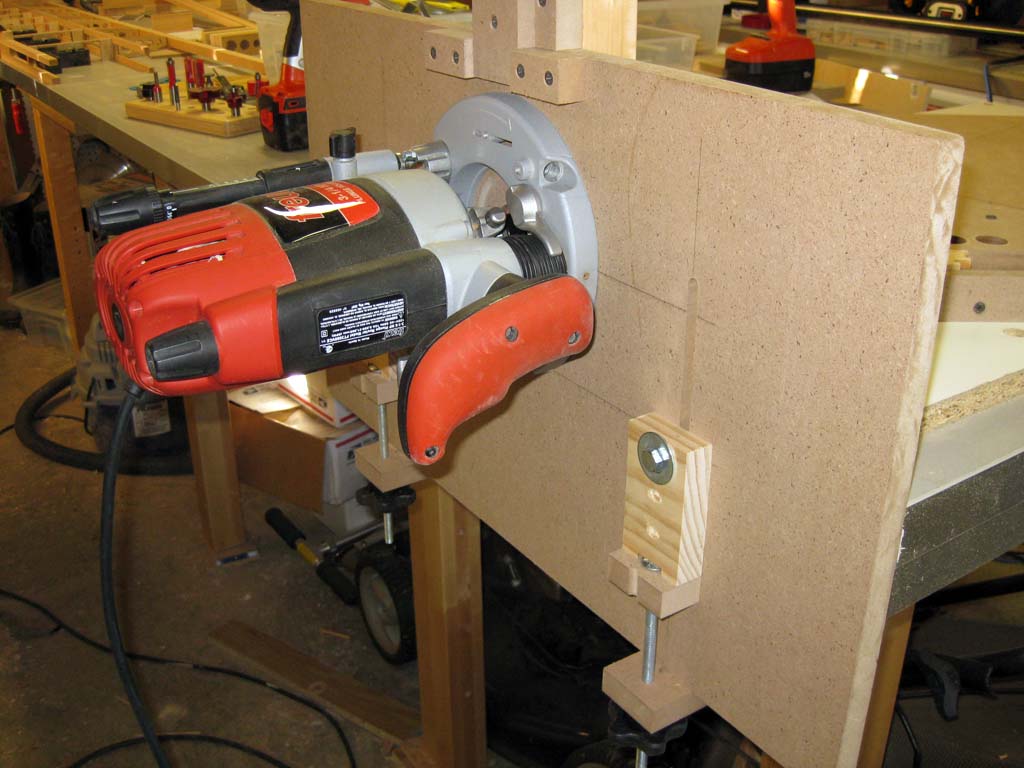
Here I made a "poor man's cnc" router (or router jig) so I will be able to cut the leading edge lamination and edge (before installing them). The router is on a upright plate which can be moved up and down. The router bit has a 11 degree bevel. The lamination is fixed by its lamination jig and a base plate. The base plate and the lamination jig has holes in the center if the radius where a pin can be inserted. There is also a plate underneath on the table (with a hole) that can be moved to a specific radius from the router plate. The router bits bearing is touching the lamination jig and preventing the router bit to cut lower than one wants. The lamination is then feed from the side and when the jig reaches the center of the radius the pin will be pushed down. The jig can then rotate until it stops on its side. Remove the pin and continue cutting on the rest of the lamination. Same jig plate an be used for different sized laminations just make different center holes. Also the router bit can be straight if one just wants to clean up a lamination. Same bevel can be used on the straight leading edge as well to make it a nice even edge.
The reason for the jig was to make a bevel leading edge that would follow the nose ribs of the tail plane. This is to make the gluing area larger and straight and the gluing process would be easier. Same bevel can also be used for a wedge clamp. Then when the glue is finished the rounded front could be made.
Just me thinking outside the dust...
Robert
 |
 |
 |
 |
 |
 |
 |
 |
 |
Hi Robert,
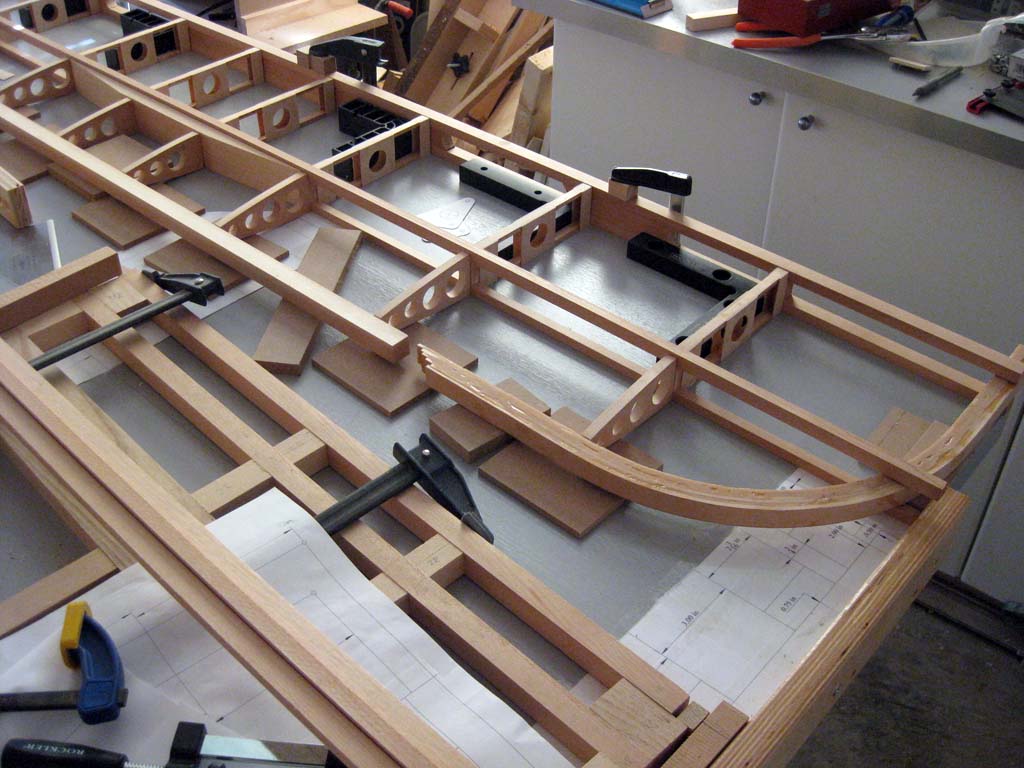
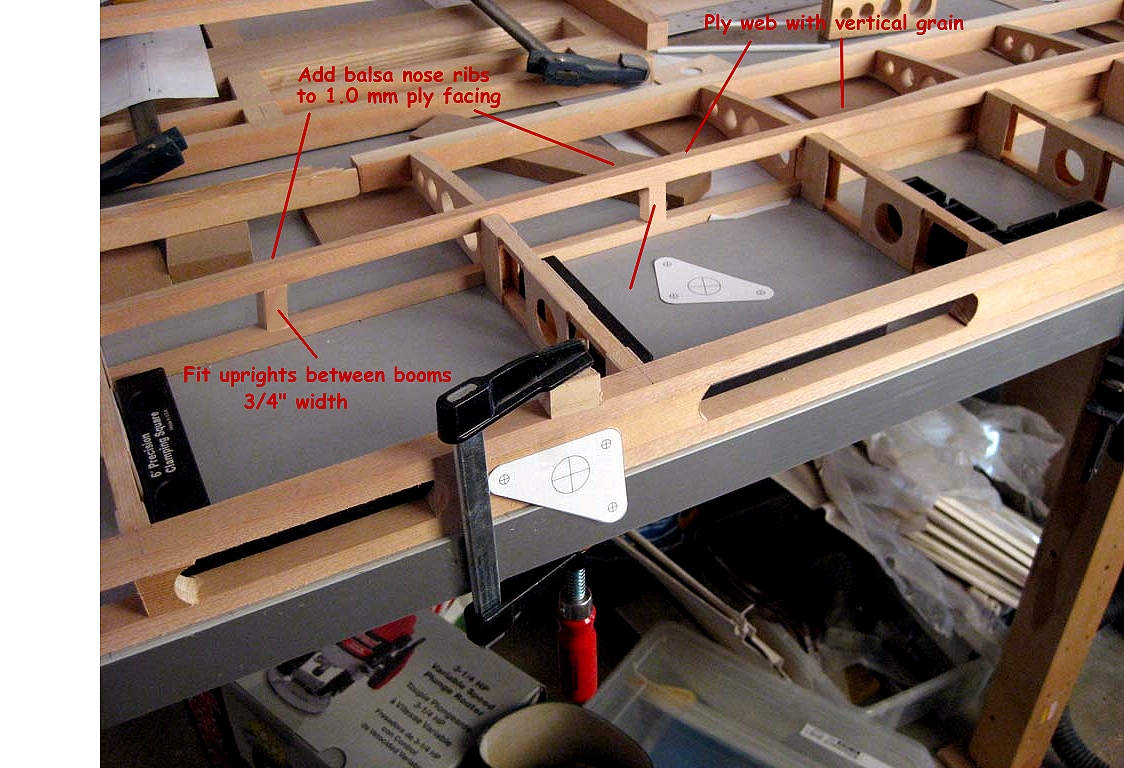
Lovely work. I suggest that small uprights are situated between the rib stations, adding balsa riblets against the 1.0 mm ply facing between the main ribs. See picture for uprights.
Did you mean was access required to the inside tailplane bracing strut fittings? To simplify attachment I suggest that nuts are welded to the inner plate so that the front plate can be bolted-on after fabric covering. The inner plate can be permanently left in place with a couple of small woodscrews to secure it until the outer plate is fitted. Put these holes where convenient.
Great progress, von Troll!
Kessler
Thanks Lynn,
Yes, that was part of the question. The tailplane will be an enclosed space so the elevator hinges back plate should be attached the same way, right?
What I also wanted to know how the plywood will be attached at the inner plate since it will go through the plywood.
The tailplane strut will be slightly angled backwards if the meeting bracket is on the sternpost, so how is the strut being made to accommodate this?
Robert
Hi Robert,
I forgot to mention that due to the very stiff (cantilever) construction of the Goblin tailplane, the purpose of the compression strut in supporting this unit is for stability of the attachment which, due to the quite small offset about centreline of the forward attachment bolts and the single rear attachment bolt, requires bracing each side to prevent damage.
Because of the desire to maintain a short nose on this compact aeroplane, additional weight at the extreme tail end of the fuselage is to be avoided.
Therefore an aluminium strut is perfectly alright in this case. It should be about 14 SWG wall thickness however. Protect the tube against electrolytic action where it is in contact with any bolts and brackets. However a comparison for weight should be made against a 17 SWG steel tube strut for the same diameter to judge whether there is any appreciable weight saving before considering the aluminium tube alternative.
Cheers,
Lynn
For the hinges, yes, you can locate the inner ones with small screw. If a single centre-line screw is used, stabilise the inner hinge with a plywood gusset each side of the metal edges to prevent rotation as on Flitzer drawing Z108. Or use staggered eye-bolt hinges.
For the strut brackets, fit the inner bracket 'permanently', ie. before the plywood skinning goes on the tailplane. This will only require a very small slot for the tongue of the bracket to protrude. If ever you need to remove this bracket, some surgery will be needed around the fitting, re-scarfing with a ply patch, but you're not likely to have to do that under any circumstances I would wish to contemplate.
For the bracing strut tube, the skew-angle which it makes to pick up on the sternpost bracket is not large. However, if necessary, slightly flatten the end of the tube where it passes through the two tailplane brackets. This can be filled with a hardwood dowel to take the compression of the bolt or if preferred, a small steel tube can be inserted (welded) through. The tube will have to be drilled at a slight angle, ie. not 'normal' (90 degrees) through the tube cross-axis, but at an angle to it. It is much easier to arrange this when you come to fit the tailplane. Use a plastic pipe or rolled paper tube to experiment with the necessary angle for drilling through. It's much easier than you think.
How are you prgressing with the fuselage, or are you concentrating on the tailgroup first?
Keep up the inspirational work.
Lynn
Thanks Lynn,
I am working on every bit and pieces at this time. I am waiting for the weather to become warmer so I can start gluing stuff together. Does not have or want heat in the workshop.
So "the big sticky glue party" is coming up soon in the Goblin cave!
Robert
|
|
|||||
| 1 | 2 | 3 | 5 | |||