
 |
 |
||||||
| 1 | 2 | 3 | 4 | 5 | 6 | ||
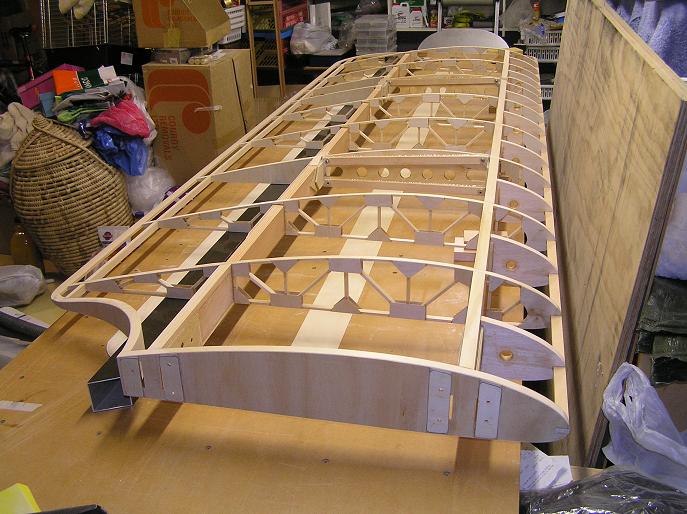
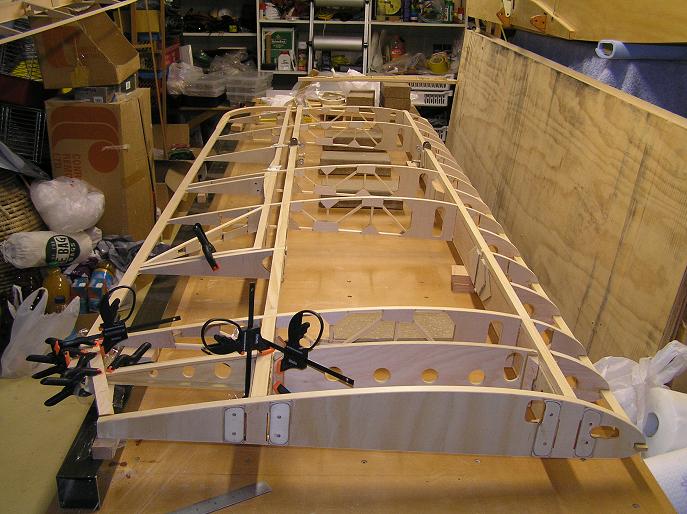
January 2, 2007 - One Wing
The first wing, top left, ready for ply,
Having previously built all the parts - - and some have been sitting around for more than a year - - I have to say that building up the wing was an enjoyable process. Still some tricky bits to do of course, and I may not be saying that after building 4 more.
Brian
 |
 |
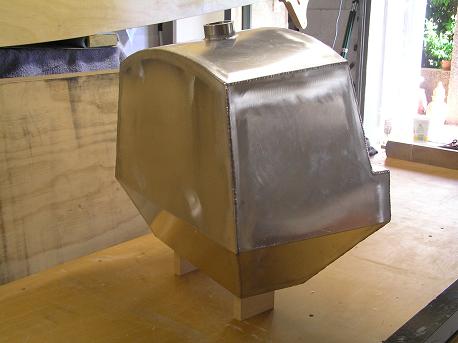
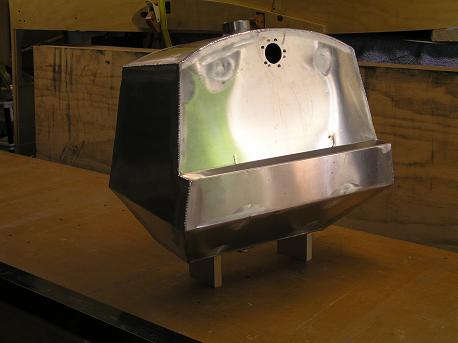
February 22, 2007 - Fuel Tank
Just got my fuel tank back from the welding shop. Very pleased with the result - - nice clean welds. And it fits in the plane nicely. I made full size patterns for the pieces - - - just two sides, front and back, top and bottom - - 6 pieces in all. [except that there are also 2 baffles inside.]
Measured the total volume last night. 55 litres, or 12 UK gallons. Yes it's a bit larger than specified, but then it will help compensate for the lighter Jabiru engine. The hole near the top is for the fuel sender. I'm using a capacitance sender and gauge after deciding against the "cork-on-a-wire" trick.
The mounting arrangement will be very similar to the original design, with straps going underneath, and the lip on the aft side fits up under the fuselage crossmember.
Brian
 |
 |
June 8, 2007 - Brakes for the Flitzer Series
I've been thinking about brakes for some time, and was leaning toward mountain bike brakes too. However, I've now changed my mind and decided on very simple band brakes, made by Azusa.
My brakes will be hand [or finger] operated, using a couple of levers mounted on the right side of the cockpit, almost matching the throttle lever on the other side. The levers simulate the geometry for mountain bike brakes.
Why did I change - - the 4 1/2" band brakes from Azusa are really cheap. The mounting arrangements for the drum, and the brake band and anti-rotation system are simple to engineer and set up. The band brakes are very tolerant of lateral movement, whereas the mountain bike disk brakes are quite critical in this area. The brake cables travel down the U/C legs inside the fairing and loop nicely to the attach points. They are ambidextrous - - interchangeable left and right.
Hydraulic heel or toe brakes might be nice, but I think that simple band brakes will do the job, and fit the period quite well.
Brian

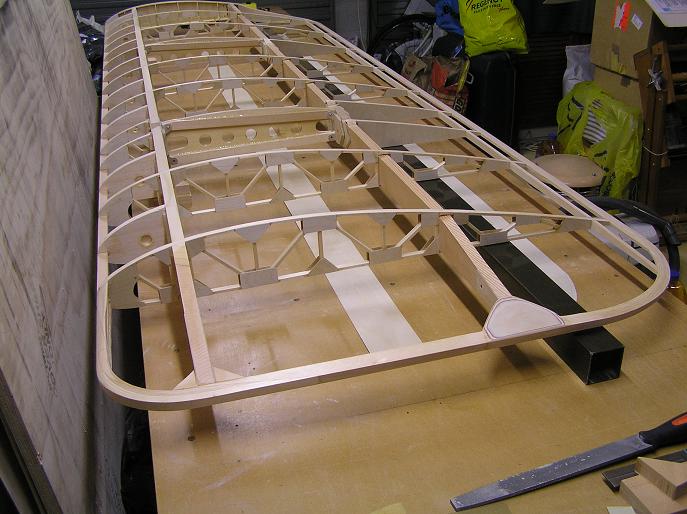
June 10, 2007 - Lower Left Wing
I decided to do wings 3 and 4 in parallel. It makes it easier remembering how you did something, and I find it easier making 2 sets of the parts I need at one go. Often it is a little quicker too as you can be doing something on one wing while waiting for glue to harden on the other.
So, here is the stage I'm at with wing 3, - - or is it 4, - - - well it's the lower left anyhow. Ailerons still attached, and will remain so until the ply is done, then they can be cut away.
Brian
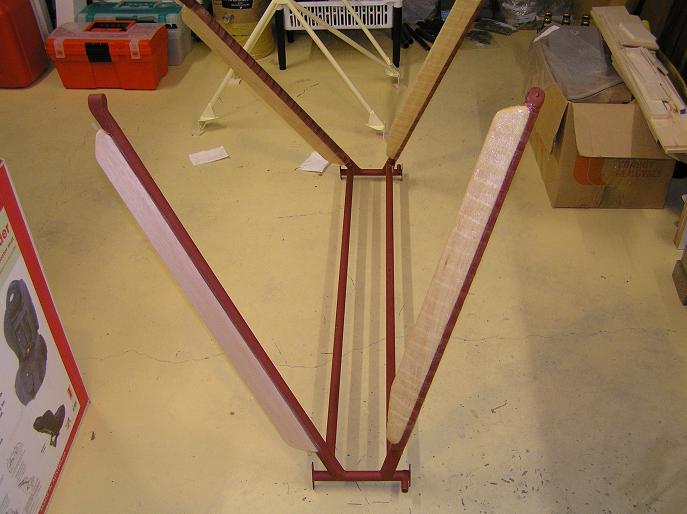
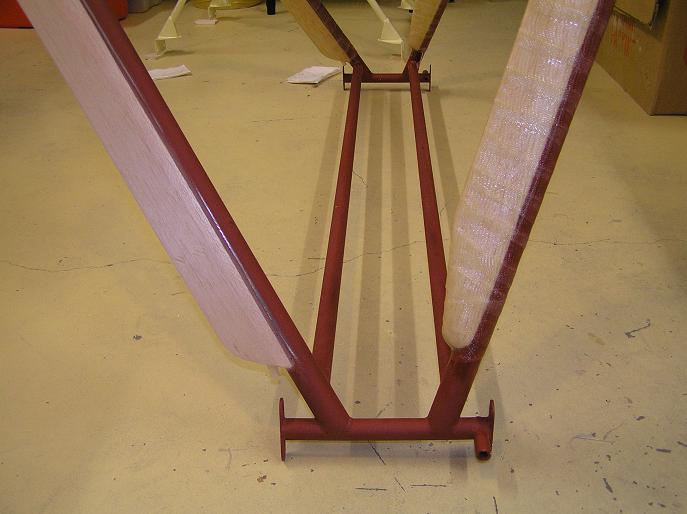
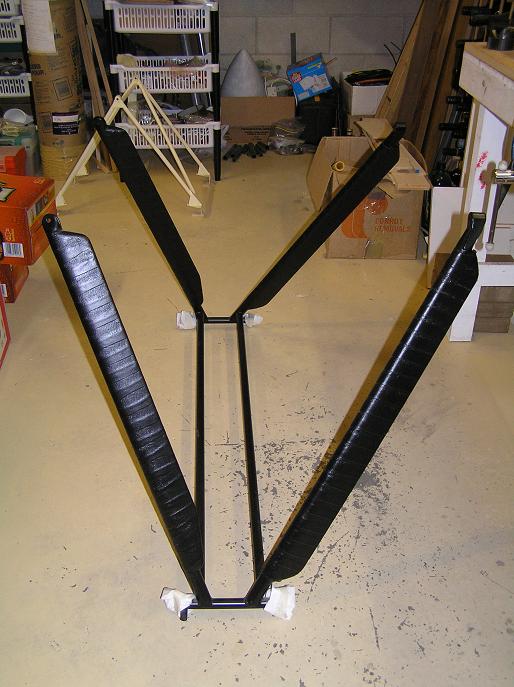
June 27, 2007 - Undercarriage
Here is another option for the undercarriage legs. It is pretty straightforward to glue balsa strips to the aft side of the legs. These can be shaped a little too, to give a better airfoil section. In my case I also fitted a tube inside the rear leg fairing to allow the brake cable to be enclosed and hidden.
Then the fairings are wrapped with fibreglass tape and epoxied over to give that antique look. The total addd weight is very minimal, and the fibreglass tape adds a deal of strength and robustness for the inevitable knocks and scrapes.
 |
 |
August 9, 2007 - Fuel Tank Improvement
At least on the Z-21A, adding volume is pretty straightforward. This tank holds 55 litres, easily fits through the cockpit, and had a deal of the added volume towards the rear, and therefore closer to the CofG. The side taper was done to provide clearance for the corner gussets.
As with every change there are consequences. This design needs a different strap support system. The same principle is used, but the straps are made from flat aluminium, bent to conform to the tank shape, and in sections that can be bolted up with access through the hole in the fuselage bottom.
Of course you still need to be aware of the increase in weight, and the movement of the CofG with fuel burn. I'll calculate all that later when I weigh the plane, and if necessary put some limits on the amount of fuel carried.
Brian
 |
 |
August 10, 2007 - Fuel Tank Improvement
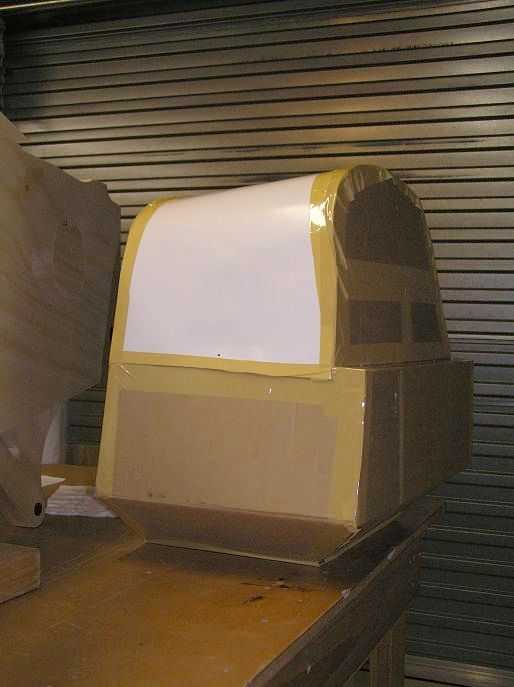
I had a local engineering shop build the tank. All the seams etc are TIG welded - - - by the same guy who has done all my other welding. His work is very good, and it helps when he understands a bit about the project and has been involved for a period of time. At about the time he was doing the tank he happened to get a flight in a P51 that was giving demo rides [for a price] during to annual Art Deco weekend here. It's not cheap, but he was pretty excited about that.
I used Alibre to create various designs until I was satisfied with the result. I wasn't sufficiently competent to do the final design with the required precision, but it was a great help being able to compare some options and to have instant calculations of volumes etc. Having settled on the shape I made a rough model from cardboard and sticky tape to make sure it would fit properly, then made accurate patterns for the pieces [only 5 pieces, plus the top which was made to fit the basic shape].
While the designs iterated I had to keep in mind the mounting arrangements too. Settled on aluminium straps, made in sections that can be bolted together, but which conform to the angles in the tank, overlap the fuselage cross-member as in the original arrangement and bolt to the firewall. These are able to be assembled and tightened up through the access hole in the fuselage floor. [Yes, I calculated the worst case stresses to make sure I has sufficient safety margin.]
Yes, it is a deal of extra work, but then this is always the way when you deviate from the plans. And it isn't over yet, because I still need to do some calculations of CG with full and empty tanks. I tried to get the additional volume as close to the CG as possible.
The depth of this tank is 17 inches from the fuselage deck, measured at the firewall - - - so coincidentally it is the same as the original.
The head available - - or lack thereof, will only become apparent when the fuel level is getting down a bit. By that time you will need to stop for a pee anyhow.
Brian
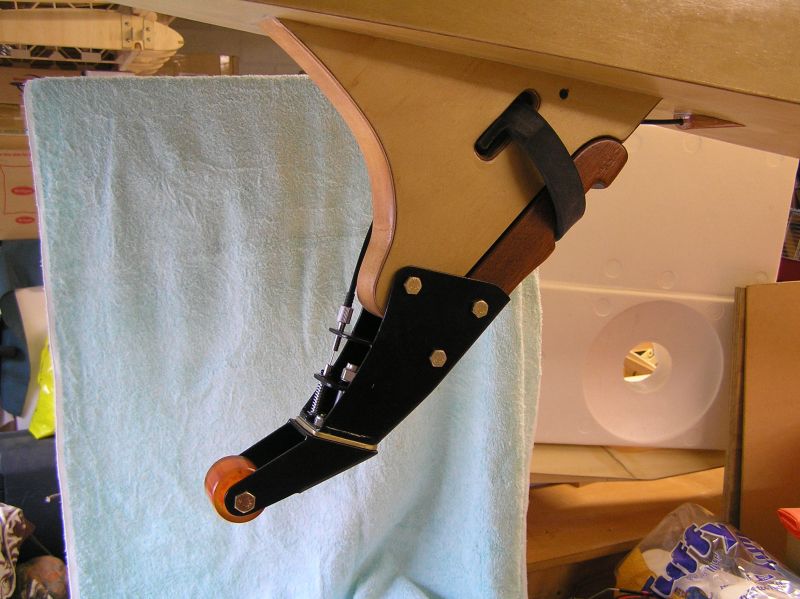
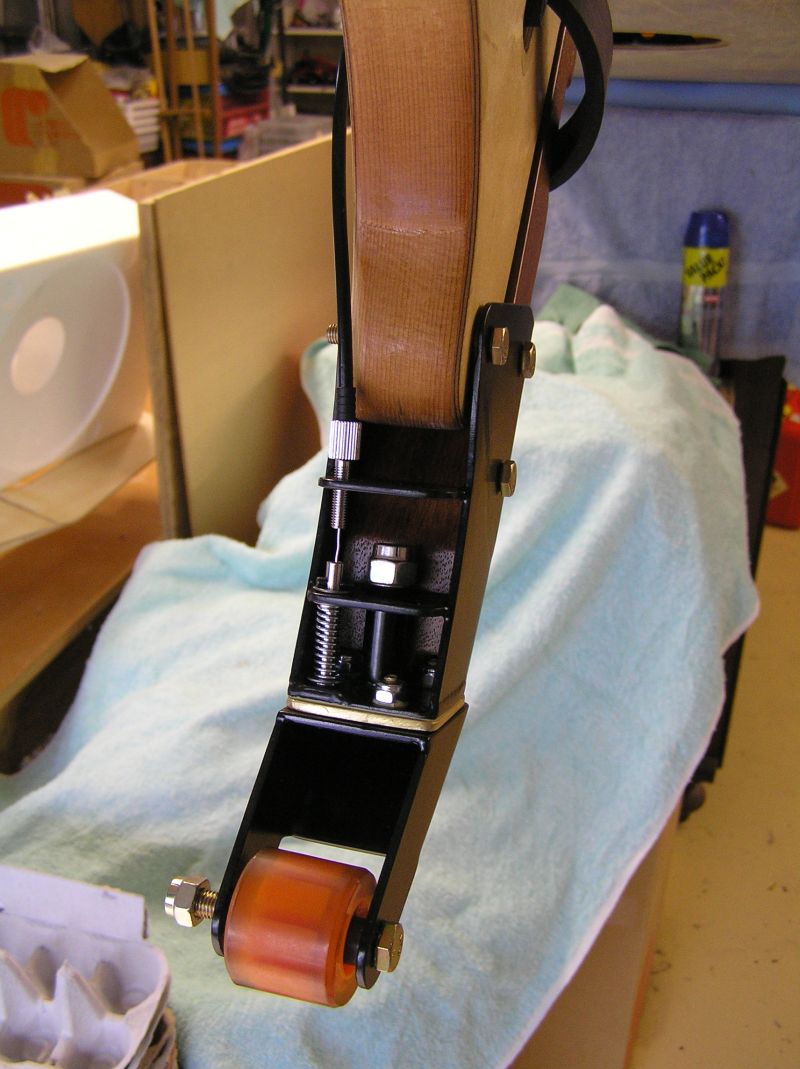
October 9, 2007 - The All Singing Tail Wheel
It has been a while getting to this point, but all the parts are ready for a demo of the assembly. See the photos.
This tailwheel:
It will be a while yet before I get to try this out as we are nearing the finishing stages of getting a new house built. Construction has been halted temporarily until we move, and the new Flitzer workshop is set up. With a bit of luck I will have the first trial assembly of the whole airframe in the new workshop somewhere around Christmas.
Brian
 |
 |
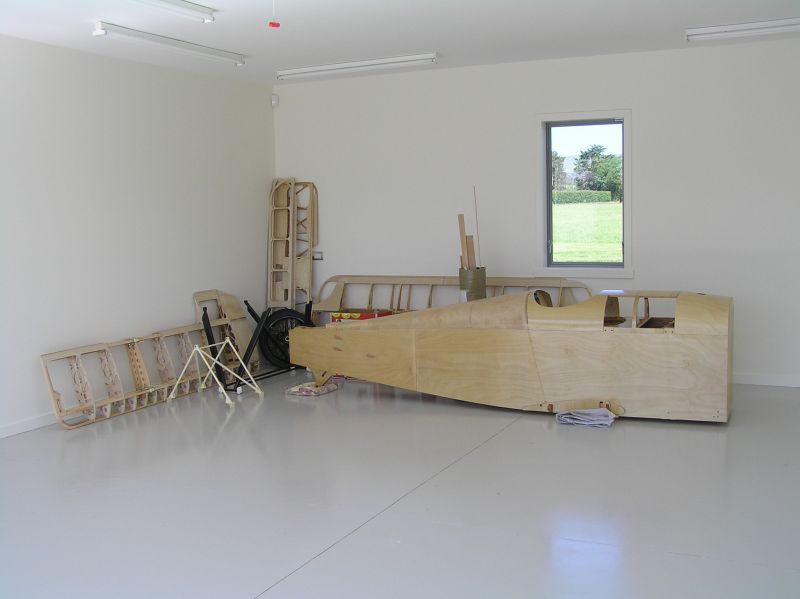
October 26, 2007 - New Workshop
The Havelock North Flitzer workshop has moved too. Work has been on hold for a few weeks [stalled - - one might say - - ] as the impending move to the new house gets closer. The major plane bits were moved yesterday into the new workshop, yet to be set up of course, and that will take a little time.
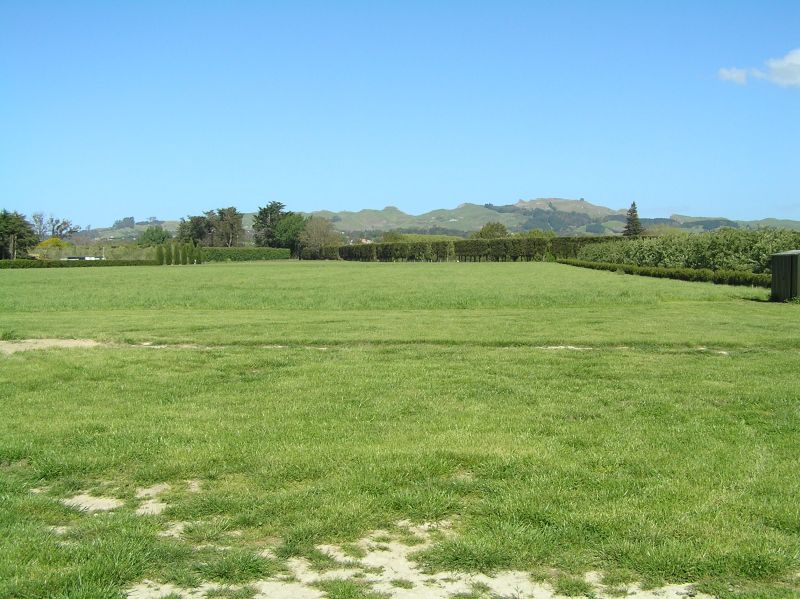
The new arrangement will allow the Flitzer to be fully assembled, in comfort, but perhaps it is just as well most of the woodwork is complete. It would be a pity to mess it all up with sawdust and wood shavings. The other photo is the view out of the workshop window. After the grass is cut for hay there will be plenty of room for some taxi tests.
Brian
 |
 |
|
|
||||||
| 1 | 2 | 3 | 4 | 5 | 6 | ||