
 |
 |
||||||
| 1 | 2 | 3 | 4 | 5 | 6 | ||
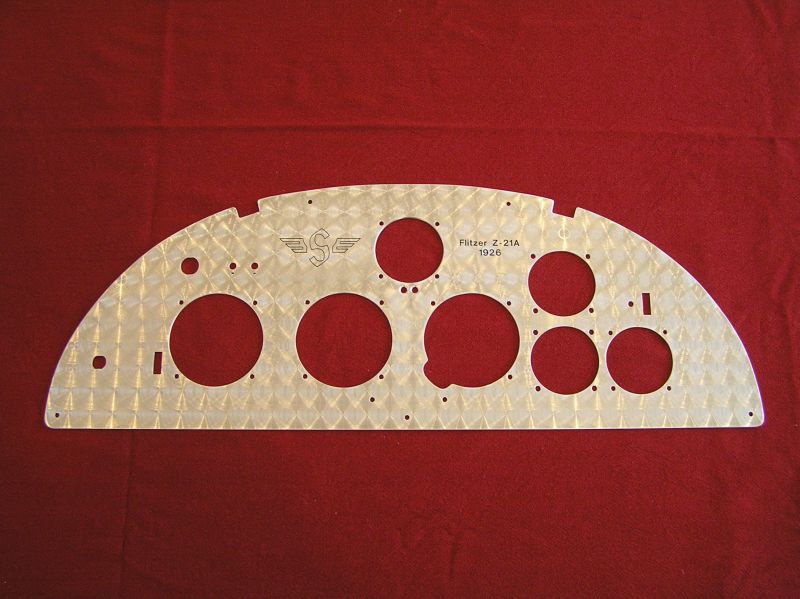
August 3, 2009 - Panel Stage 1
I relented and decided to experiment with engine turning. Did a test on the back of the panel first to see what it looked like. Just got it back from the engraver this morning so I filled the lettering and logo and gently flattened off the engine turning to make it a little less "in-your-face". The logo .eos file is invaluable as the engraver was able to use that directly to set up his machine.
I think this is acceptable, so now I can finish the labelling and mount the instruments. This is a very pleasing milestone as it feels like I am getting closer to finishing.
Brian
September 9, 2009 - The Amazing Little Jig
A wooden one, not an Irish one!
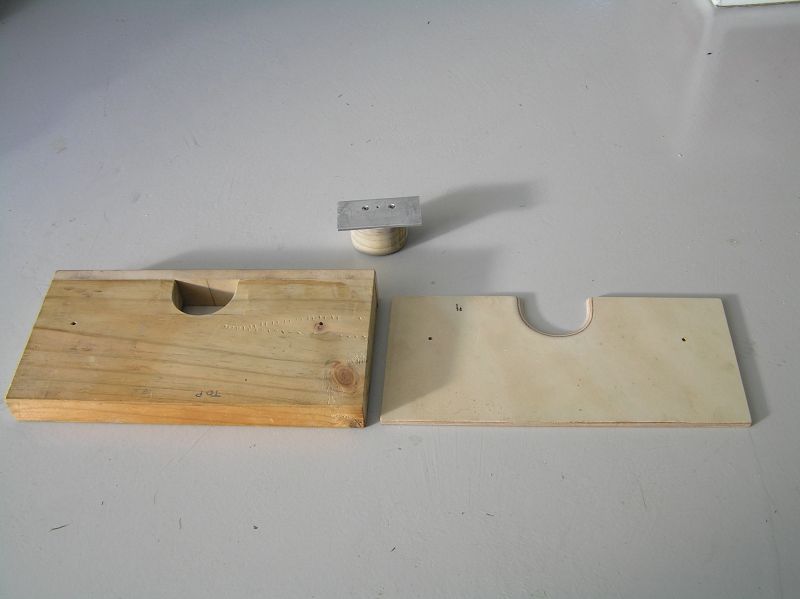
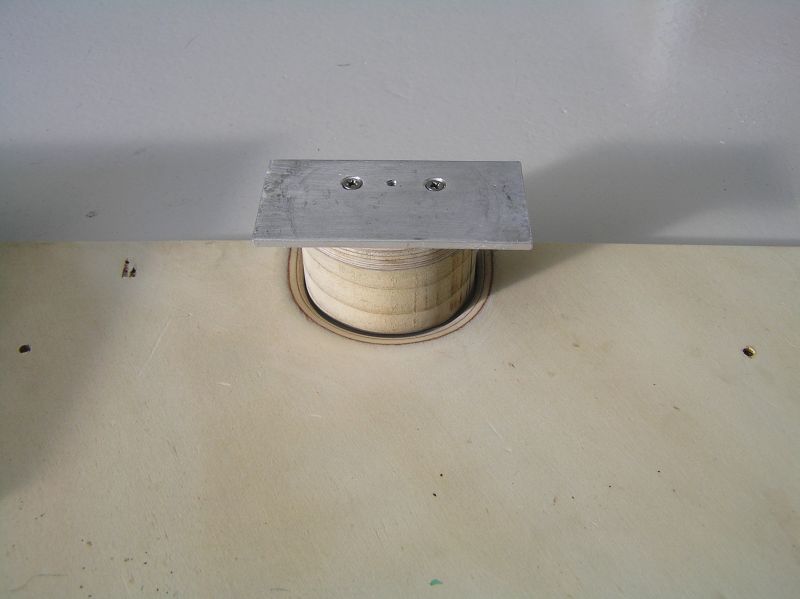
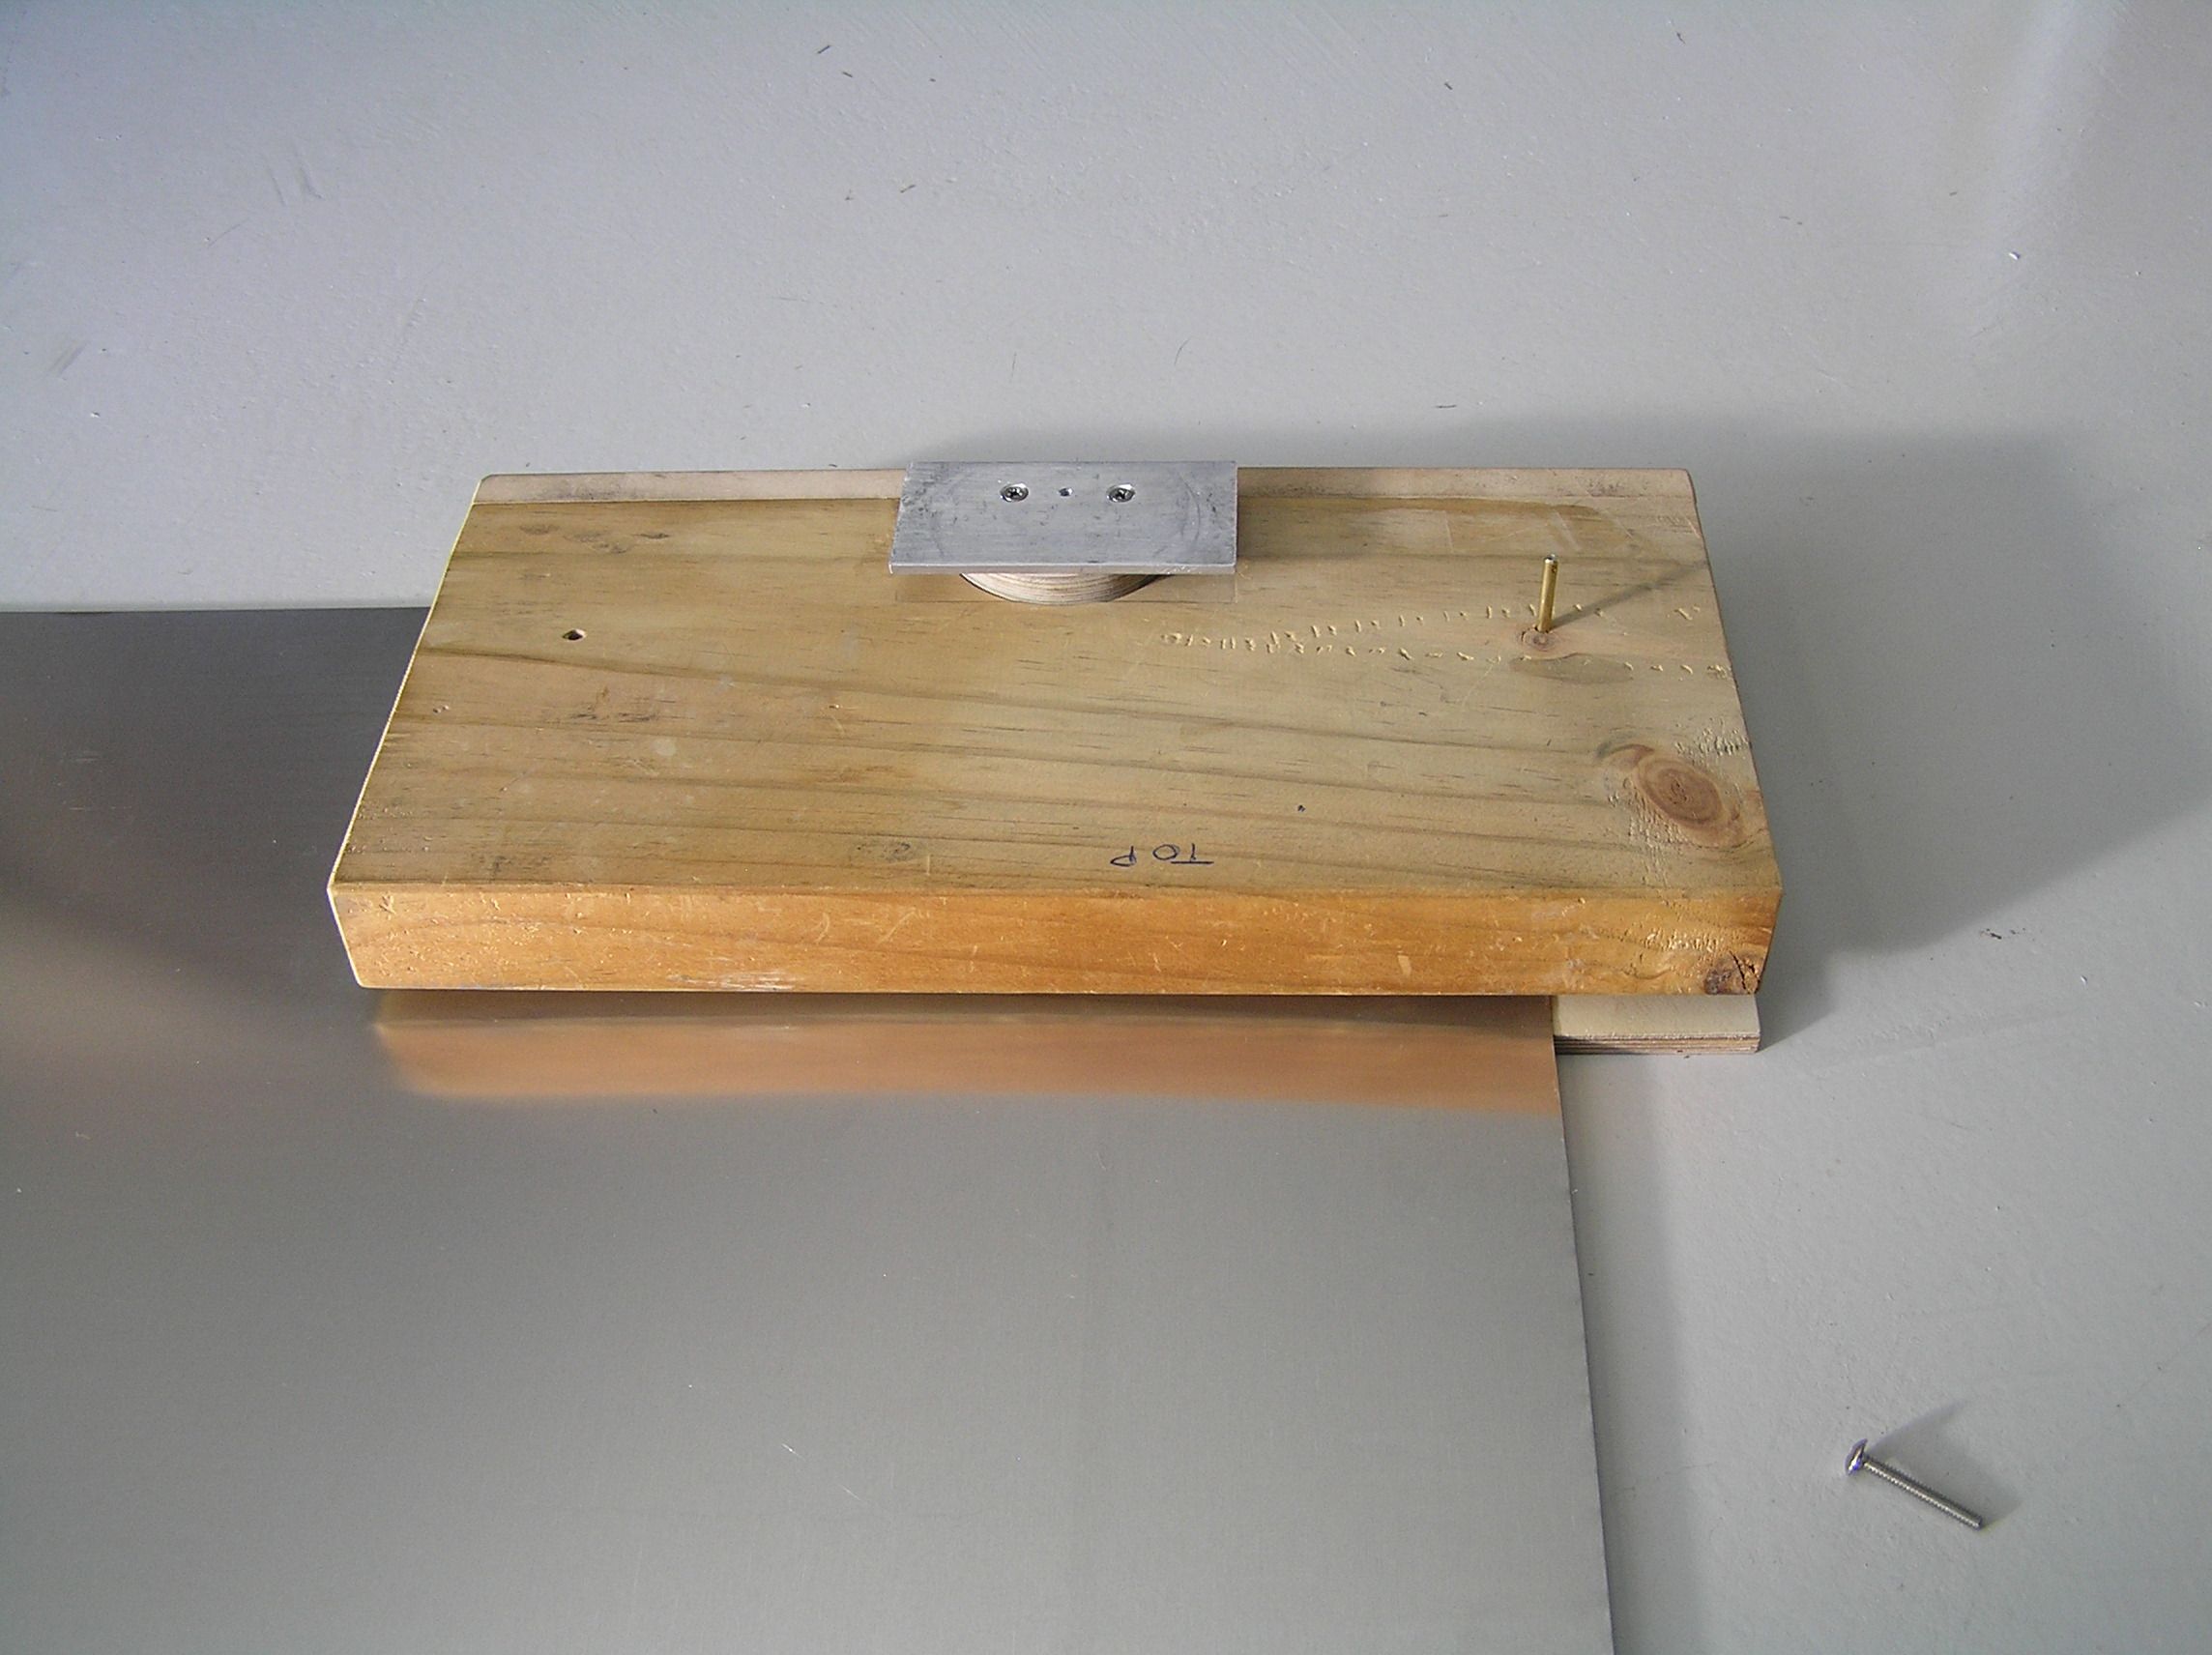
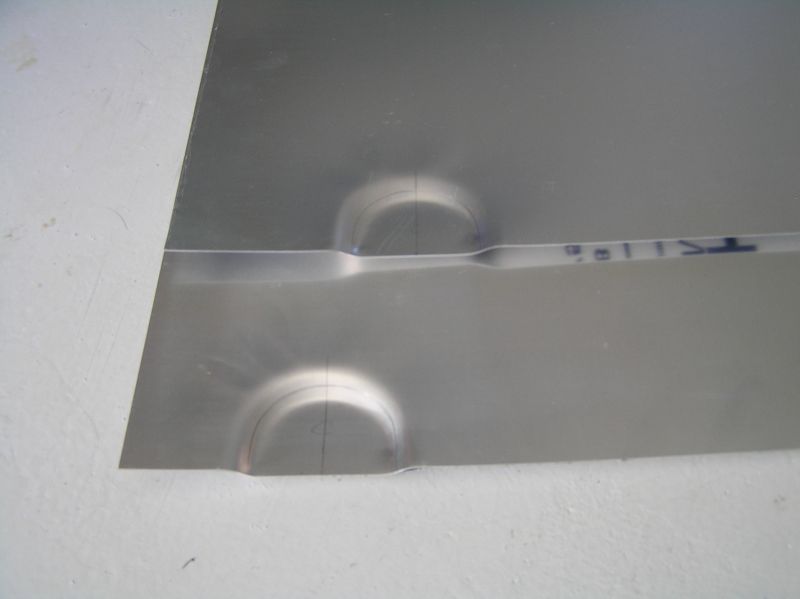
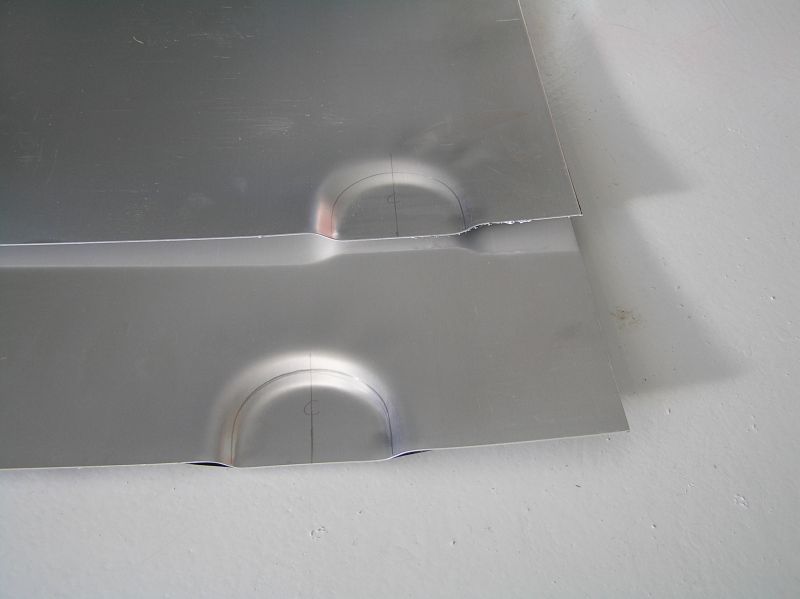
Figuring out how to make the dimples on each of the aluminium covers under the cabane, to provide clearance over the cabane bolts has excerised my mind for some time. I made a wooden form to test the possibility of pressing, or hammering these dimples. Tried squeezing the form blocks in the vice, but I couldn't exert enough pressure. Tried hammering and didn't like the result. Tried putting the form blocks under the car jack and lifted the car. Still not enough pressure. Visited the local engineering shop and talked to the guys about using a press. Yes - - now we might be getting somewhere.
I made a wooden jig to hold everything in place and did a test using a scrap of 0.6mm 2024 aluminium. The result was not great but looked promising, and the jig needed some refinements. I improved the jig and ordered some commercial 0.6mm alumimium. This is 5025 H23, and is described as half hard. It is a deal softer than the 2024 and looked like it might draw much better.
Today was the big test on the real panels. The jig worked fine, and I think the results will be very acceptable. The 5025 works a lot better, and it is surprising how much the drawing process hardens up the material. The next step is to roll the panels to shape, and I have found someone at the local airport with the rollers to do it. Rolling ought to stiffen the panels too, so the plan is to roll cautiously back and forth if necessary to get the shape and the stiffness. If any little ripples remain then they can be gently hammered out.
The jig was carefully engineered to produce the correct depth of dimple. But, the second press was a little bit more severe, and the 3rd and 4th dimples were only marginally deep enough. I measured the plug and found that the 2nd press had compressed the plug, perhaps 1mm. Not surprising over a total depth of 40mm, and the fact that the plug is pine, with ply laminations on top.
The photos show the disassembled jig, the plug with the aluminium top plate which acts as a depth gauge, and the panels - - as pressed - - with no attempt yet to tidy up the result. I think these will be acceptable.
There are probably other ways of doing this, but perhaps this will also help other builders, who like me find the metalwork a bit of a challenge.
Brian
 |
 |
 |
 |
 |
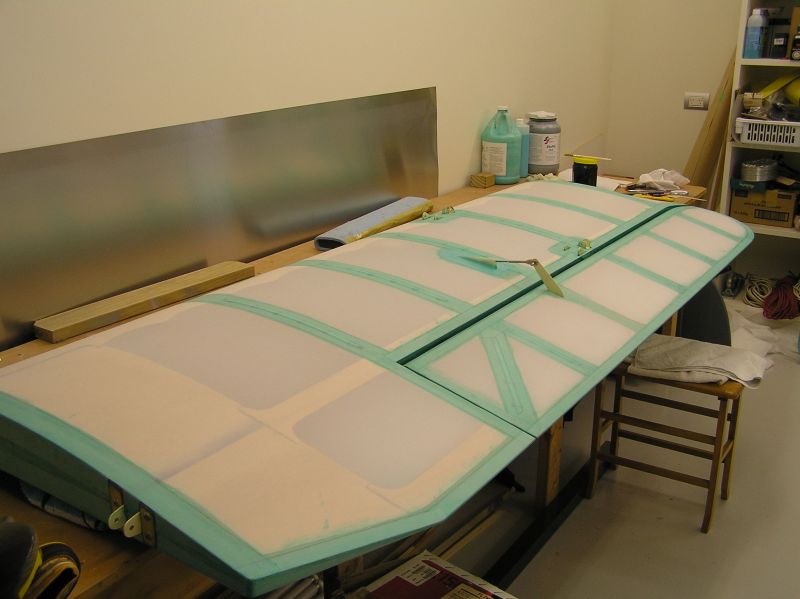
September 23, 2009 - GRP Shroud
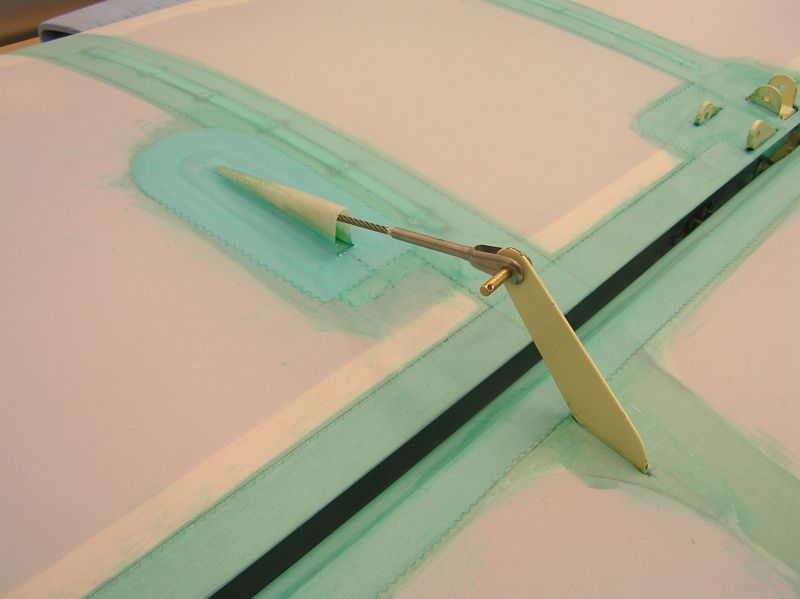
Another milestone. Covering of all flying surfaces is now complete. Fibreglass shrouds fitted to aileron cable exits on each lower wing.
Max, I checked out my order for Ceconite. 20 yards of Ceconite 102 [approx 71" wide]. This was enough for all the flying surfaces. I did a cutting pattern to scale on paper first to ensure that I had enough to cut out all the pieces. 2" Lite tape was used for finishing over the ribs and trailing edges, with 3" bias tape on the wing tips and tailplane tips to get around the curves more easily, and 4" Lite linear on the leading edges.
Brian
 |
 |
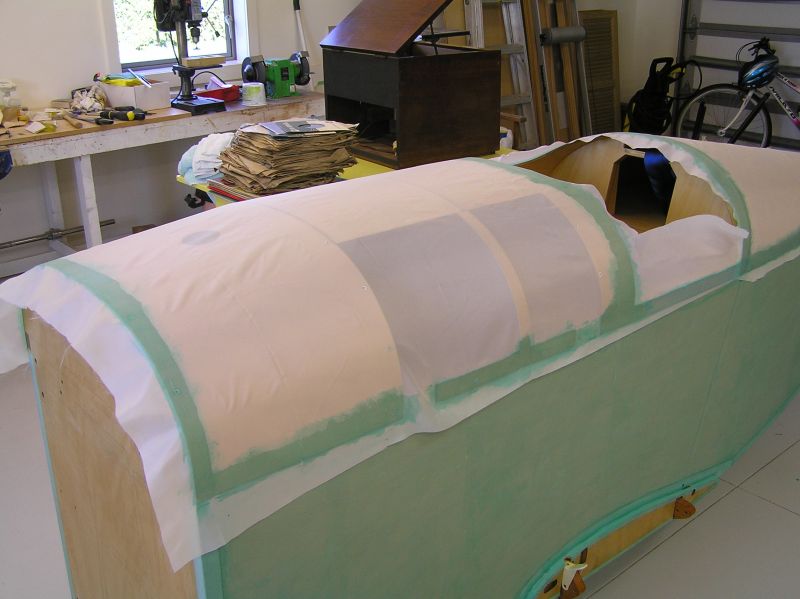
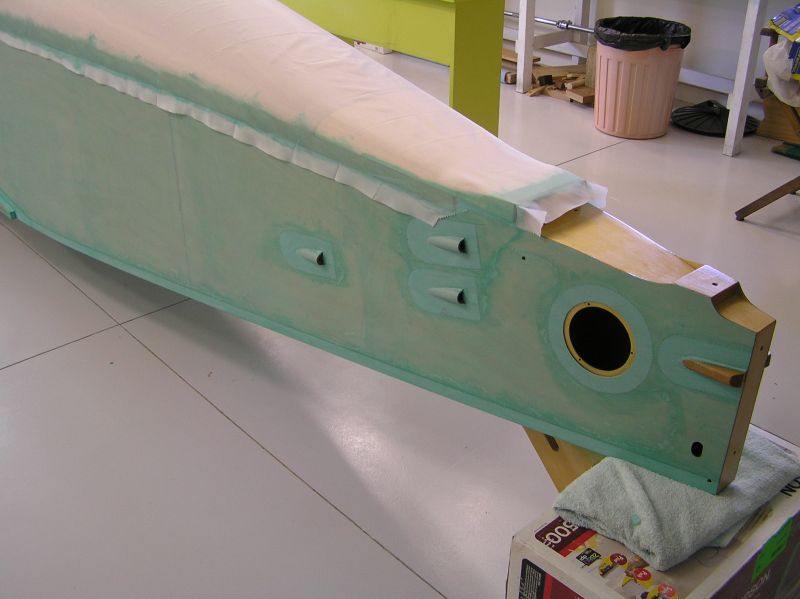
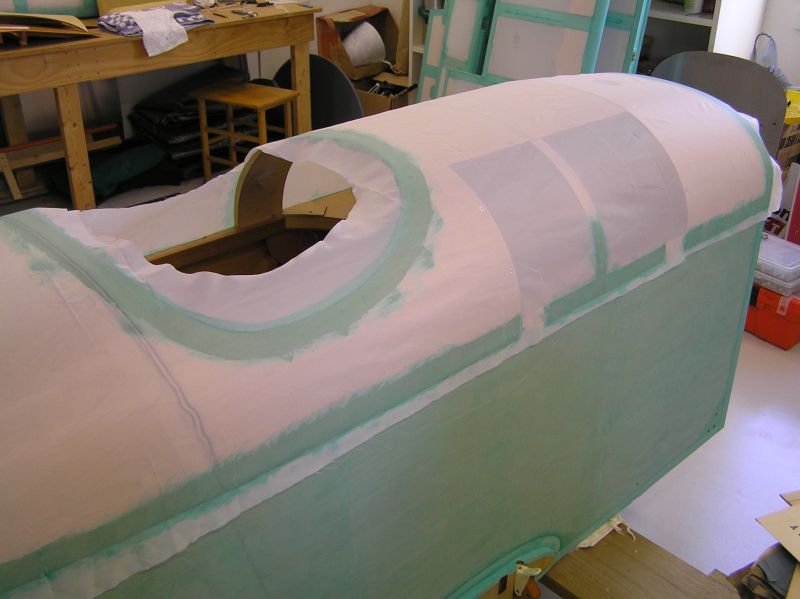
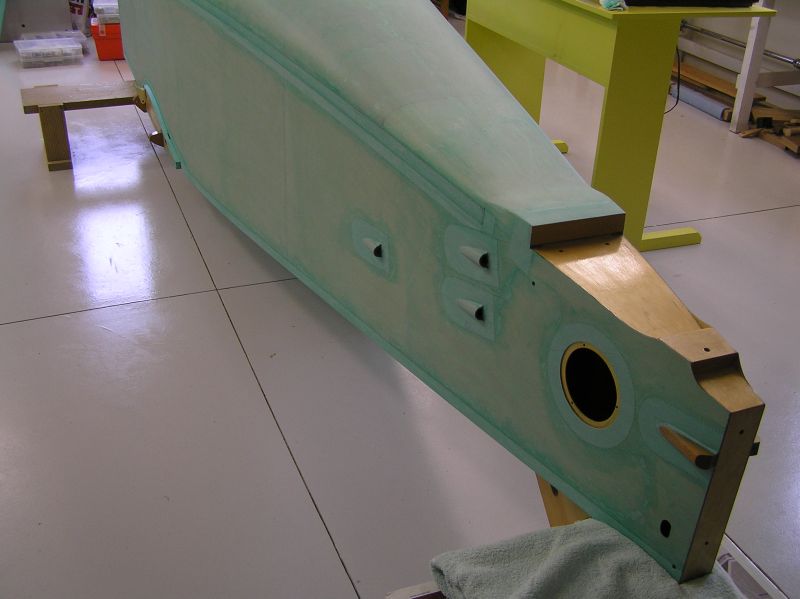
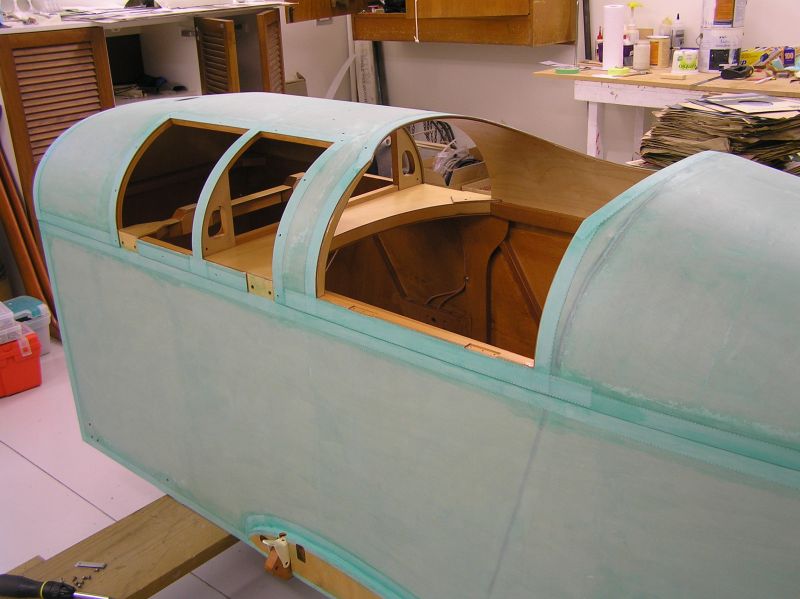
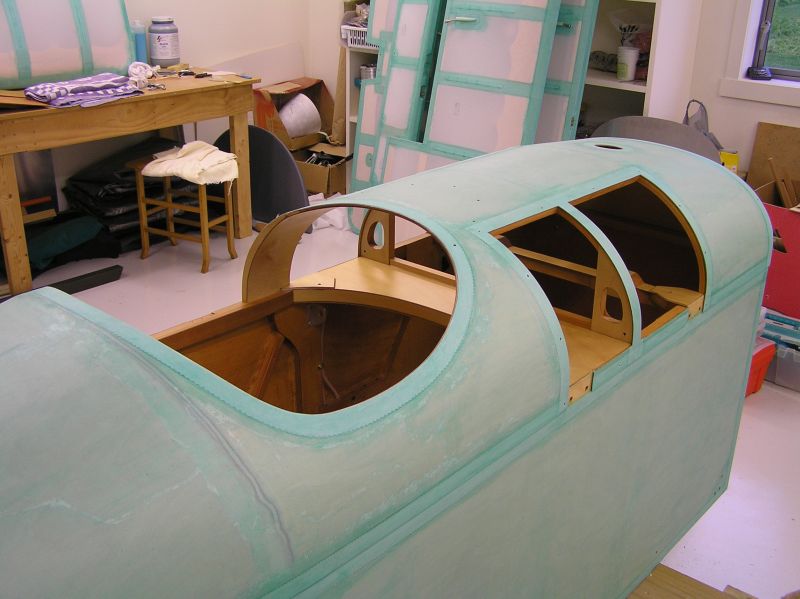
October 8, 2009 - Half Skinned
Having never done any fabric work before, I left the fuselage covering until last. Pleased that I did because it turned out a lot easier than I had earlier expected, with the benefit of the lessons learned while covering all the flying surfaces. I would have been more confident perhaps if I had seen photos of the process, so the attached series may help others.
The trickiest part was getting the fabric to sit right over the many different curves on the fuselage top. Turns out that by providing for one small join on the left rear cockpit sill [that is virtually invisible], and with a bit of finessing here and there it was possible to do the whole top in one piece of fabric.
After gluing around the edges the fabric was shrunk in the normal manner, then glue was squeegeed on, and pressed through the fabric to secure it all over. With the Stewart System priming of the surface underneath was not necessary, and the glue penetrates the fabric weave very easily for a good bond. Using the squeegee and doing about 1 sq ft at a time, then wiping in the normal manner, is quick and uses much less of the Ekobond cement too.
Ah well! Another milestone, with all the fabric completed.
Brian
 |
||
 |
 |
|
 |
 |
|
 |
 |
|
December 22, 2009 - Santa bought the Flitzer a Gazebo for Christmas
My plan was to paint outside on calm days. Right ! In the last month we have had one calm morning suitable for painting. I set up the fin and rudder and gave them a spray of primer. Worked OK but on each surface I got one pesky little insect go plop right in the middle of the wet paint.
Getting frustrated so I have devised another plan. Found some very cheap [and flimsy] gazebos at a local chain store. 3M x 3M square. Assembled two end to end in the workshop, and hung cheap plastic drop sheets from the top rails. The workshop vacuum cleaner will suck air out and clean air will enter via the gap at the top between the gazebo roof sections. Thankfully there is plenty of light through the translucent drop sheets.
The fuselage is masked ready for a couple of coats of primer, one grey and one white. It is able to be turned on the rotisserie in 45 deg steps by one person [see the frame at the front]. The tail end is supported by a post and one bolt through one of the fin mounting holes.
So with a bit of luck I will be masked tomorrow too, and into the spraying.
Brian
 |
 |
|
|
||||||
| 1 | 2 | 3 | 4 | 5 | 6 | ||