There are a few laminated bows to make for the production of a Flitzer, and even more for a Stummelflitzer. The process basically involves producing a former and bending a group of laths around it. This results, after the application of a little adhesive of course, in a very strong and light curved timber component.
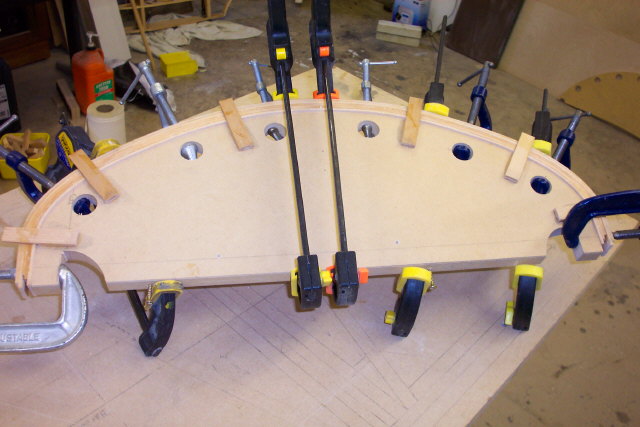
| A) | Make a former from suitable material. I find ľ" MDF to be ideal as it is easy to work and easy on the wallet. Don’t forget that the shape of the former has to represent the inside curve of the component! If is is something like an upper decking former, as the example in this write up, mark a centre line and base line on the former which can be transferred later to the finished component. Think about clamp positions and cut notches and bore holes to take them. Glue some short small sections of timber to one side to act as lining up gauges. Apply cellotape or similar to the edge and supports to avoid component sticking to former. |
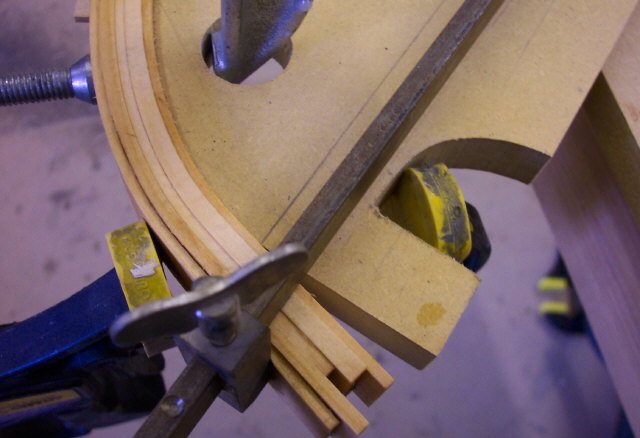
| B) | Cut your laths at least 2" too long. It is also not a bad idea, if possible, to cut them about 1/32” over width. This gives a little sanding tolerance to tidy the component up at the end of the job. The thickness of each lath is not critical but 1/8” is about right. Much thinner and more adhesive will be used, although the bending will be easier. Much thicker and they will be difficult to bend and there may not be enough laths for the finished component to hold its shape. The main thing is that they add up to give the overall thickness that is required. |
| C) | Soak the laths in water (preferably hot) for at least a couple of hours, overnight is better (I know the water will go cold. A dedicated builder will get his wife to get up at hourly intervals to change it though) |
| D) | Clamp the lathes to the former and allow to fully dry. This can take a day depending on the weather or if you have a suitable radiator in the workshop. |
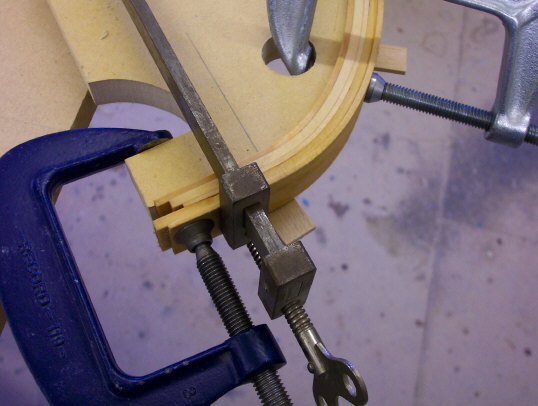
| E) | When dry, but still clamped in position, mark the laths and put a corresponding mark on the former. Also put some kind of marking to indicate the order in which the laths should be reassembled after the application of adhesive. I use an arrowhead shape. This shape will only fit together again when the correct order is achieved. |
| F) | Remove laths from the former and lay out on bench in order. Have all necessary clamps to hand, and set somewhere near the measurement needed. After the adhesive has been applied to the laths you do have to work quickly, and you have to forget that phone that is ringing (it always seems to at this point!). Take a moment to think about where you need to apply the adhesive (and the acid if you are using Aerolite). There will only be four glue lines for four laths etc. |
| G) | When all adhesive has been applied bring the laths together using the marks for reference, and offer up to the former. Start clamping at the centre of the component and work outwards progressively from there. Ensure that the laths are down onto the sticky out supports and that their edges are flush with each other. A speed clamp can be useful here as you can quickly use it to clamp the group of laths from edge to edge to line them up. When satisfied that all is well remove as much excess adhesive as possible. It is possible, of course, to build the component up in stages by just doing half of the laths at a time. I would consider this if doing a large component where more than five or six laths were utilised but this is not the case in Flitzerworld. But if you are initially a little short of confidence it may be the way to go for you. It will take a little longer but so what? |
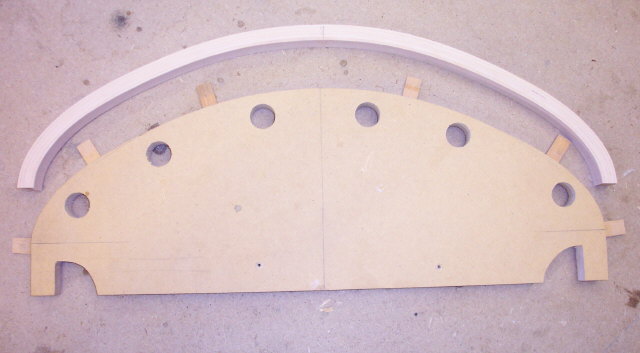
| H) | When adhesive has cured, sand edges to remove excess adhesive and get down to clean timber. Mark the centre line (if applicable) and the cut off lines at each end. Cut ends off to marks and voila, one more bit of Flitzer. |